Staining wood is a transformative process that brings out the natural beauty and character of the material. Whether you’re refreshing an old piece of furniture or starting a new project, understanding how to stain wood is an essential skill for any DIY enthusiast. This guide will walk you through the steps to achieve a stunning finish.
How to Stain Wood: A Step-by-Step Guide
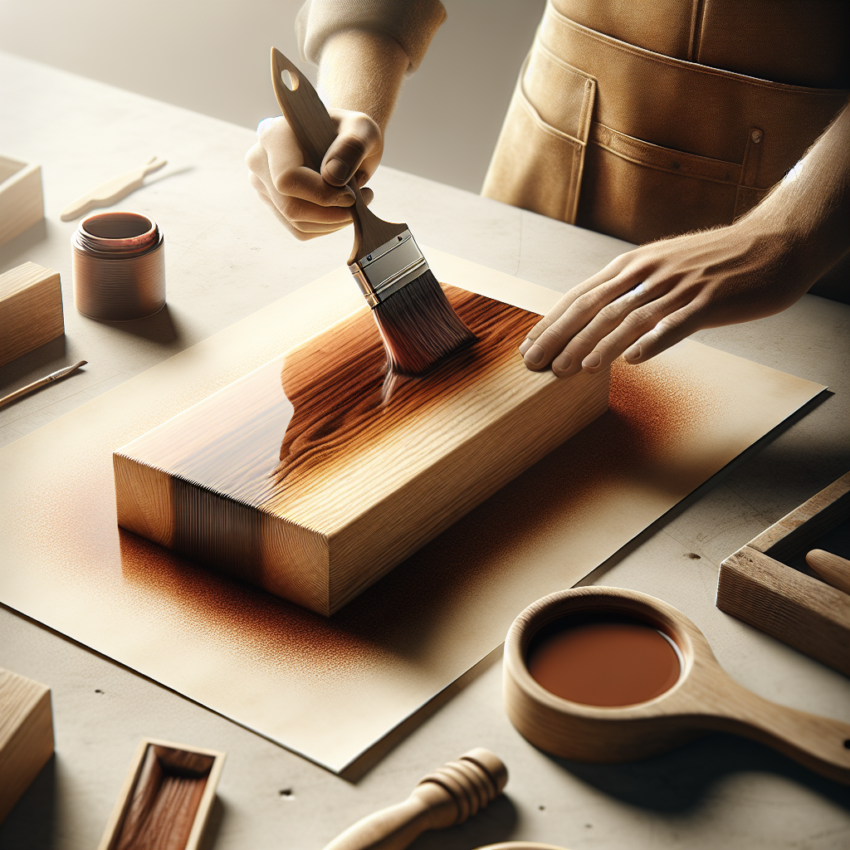
Before you begin, it’s important to gather all necessary materials and set up your workspace. You’ll need sandpaper, a clean cloth, your chosen wood stain, and a brush or sponge applicator. Make sure your work area is well-ventilated and protected with drop cloths to catch any spills.
1. Prepare the Wood Surface
The first step in how to stain wood is preparing the surface. Begin by sanding the wood to create a smooth, even texture. Use a fine-grit sandpaper, working with the grain of the wood. This will open the wood’s pores for better stain absorption. Wipe away any dust with a damp cloth.
2. Apply the Stain Evenly
Choose your stain type — oil-based stains tend to penetrate deeply and offer rich color, while water-based stains dry quickly and have less odor. Using a brush or sponge, apply the stain evenly along the grain. Wipe off any excess with a clean, lint-free cloth to avoid blotching. Allow the first coat to dry completely before assessing if additional coats are necessary for your desired finish.
3. Evaluate and Apply Additional Coats if Needed
A single coat might be sufficient, but you can apply multiple coats for a deeper hue, allowing each to dry completely between applications. Be sure to sand lightly between coats with very fine sandpaper to maintain a smooth finish. This step ensures that the stain adheres uniformly across the surface.
4. Seal the Surface
Once you’re satisfied with the color, sealing the wood is the final step. A polyurethane finish can protect your stained wood, preserving its beauty and increasing its durability. Apply the sealant with a clean brush, again in the direction of the grain to enhance the wood’s natural patterns.
Common Mistakes to Avoid
When learning how to stain wood, there are common pitfalls to watch for. Avoid staining in direct sunlight or high humidity, as these conditions can affect drying time and color uniformity. Additionally, skipping the sanding process can lead to uneven stain absorption, detracting from the wood’s appearance.
If you’re looking for more home decor inspiration, consider checking out how to decorate your home with vintage maps. It’s a timeless trend that pairs beautifully with rich, stained wood tones.
Maintaining Your Stained Wood
Proper maintenance can keep your stained wood pieces looking vibrant for years. Dust regularly with a soft cloth, and clean any spills immediately to prevent water damage. Occasionally, you can reapply a sealant to refresh the surface and enhance protection.
For further information on wood staining and other home improvement projects, visit the health implications of materials used in home improvement.
Mastering the art of how to stain wood not only enhances your immediate project but also builds a valuable skill set for future endeavors. With practice, patience, and precision, your stained wood pieces can become the centerpiece of your home, admired for their stunning finishes.
- Properly preparing wood is key to a beautiful stain outcome.
- Choose the right type of stain for your project needs.
- Multiple coats may be required for darker finishes.
- Sealing your stain enhances durability and appeal.
- Regular maintenance preserves the life of stained wood.
What types of wood stain are available?
There are primarily two types: oil-based, which offers deep color penetration and durability, and water-based, known for quicker drying times and ease of cleanup.
How long should wood stain dry before applying a sealant?
It’s best to allow the stain to dry for at least 24 hours before applying a sealant. For optimal results, consult the product instructions specific to your stain.
Can I stain wood without sanding it first?
Sanding helps ensure an even stain application by smoothing the wood surface and opening its pores. Skipping this step can lead to a blotchy finish.
Is it necessary to seal the wood after staining?
Yes, sealing protects the stained surface from damage and wear, enhancing its longevity and appearance.
Can I apply a new stain over an existing one?
It’s possible but requires thorough preparation. Sand down the existing finish to allow the new stain to adhere properly.